Personalized Bunny Baskets: How to Use Your Cricut and Heat Press to Create Adorable Easter Gifts
A Fun and Easy DIY Project to Make Easter Extra Special for Your Little Bunnies!
Spring is in the air, which means Easter is just around the corner! And if you’re anything like me, you love making the holiday extra special with personal touches. Today, I’m sharing a super fun and easy Cricut project that’s perfect for Easter—customized bunny baskets! Whether for your own kids, grandkids, nieces, nephews, or even as a sweet little Easter gift for friends, these personalized bunny baskets are an adorable and practical addition to any Easter celebration.
What You’ll Need:
Before we hop into the tutorial (see what I did there?), here’s what you’ll need to gather:
- Cricut machine (I used my trusty Cricut Explore Air 2, but any model that cuts heat transfer vinyl will work)
- Heat Press (an EasyPress or a regular heat press will do the trick)
- Heat Transfer Vinyl (HTV) (choose colors that match your baskets!)
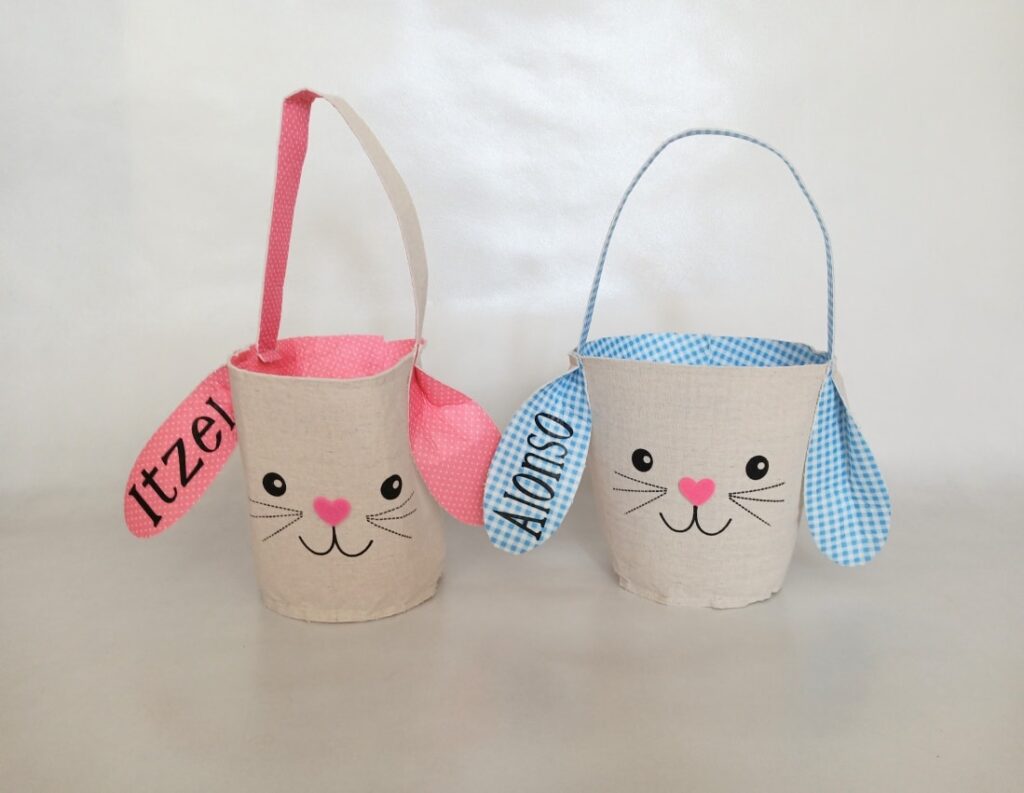
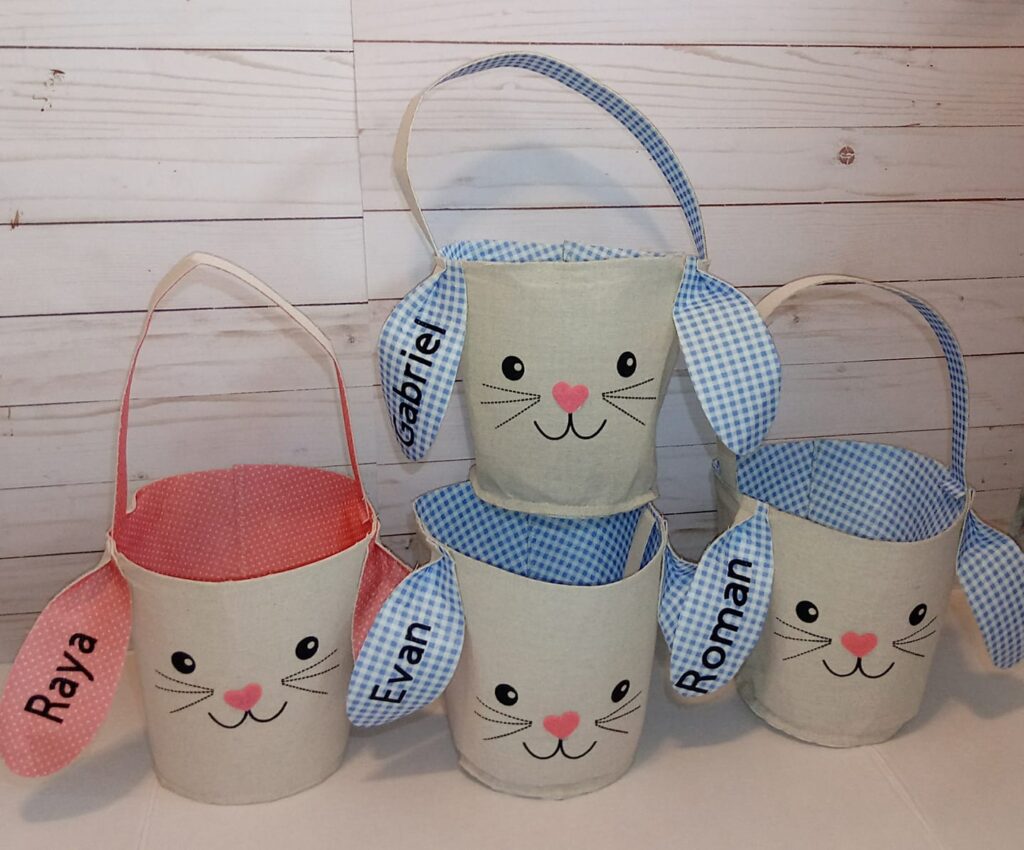
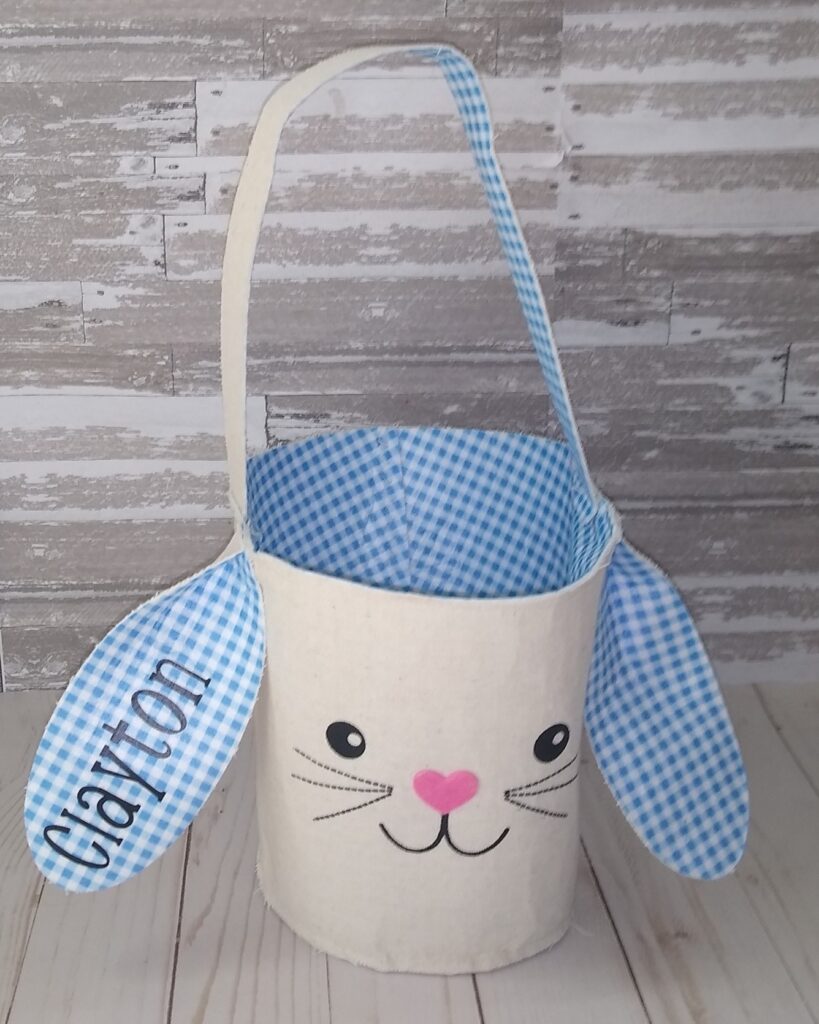
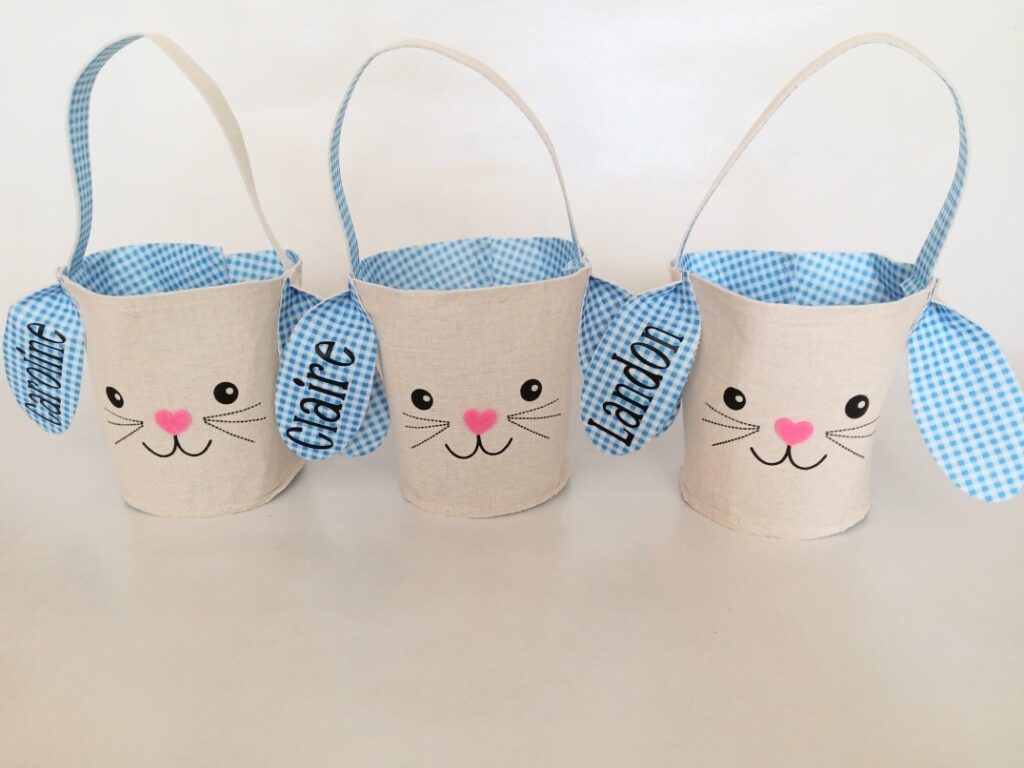
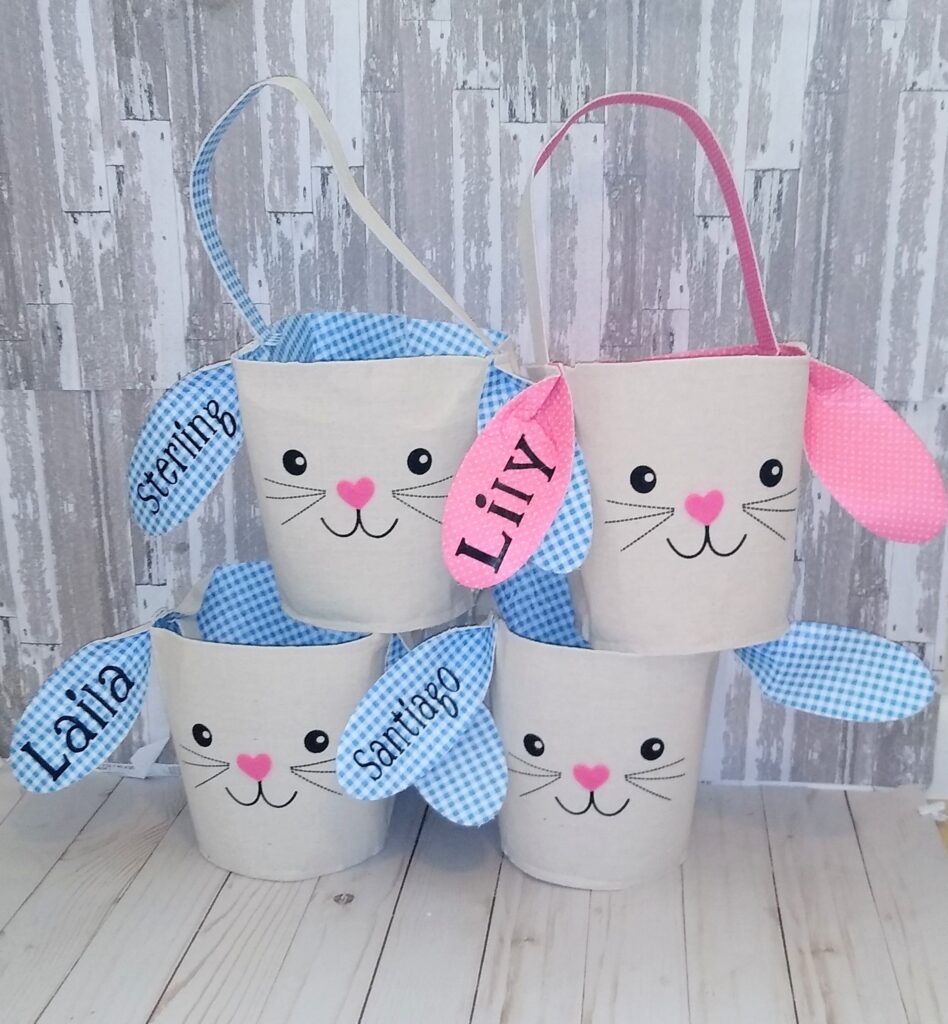
- Blank Bunny Baskets (like the ones in the image—burlap or fabric works great!)
- Weeding Tools
- Teflon Sheet or Parchment Paper
- Scissors
Step-by-Step Instructions:
Step 1: Design Your Names
Open Cricut Design Space and create a new project. Choose a fun, playful font that complements the cuteness of the bunny baskets! (Script fonts or chunky handwritten styles work great.) Type out the names you want to add and adjust the size to fit onto the bunny’s ear. If you don’t have Cricut Design Space you can get it here: https://design.cricut.com/
👉 Pro Tip: If you want a more polished look, slightly curve the text to match the natural shape of the ear!
Step 2: Cut the HTV
Once you’ve sized everything correctly, it’s time to cut! Load your heat transfer vinyl into your Cricut, shiny side down, and don’t forget to mirror your design before hitting the cut button. (Ask me how I know this is important—let’s just say I’ve wasted my fair share of vinyl.)
Step 3: Weed Like a Pro
After the Cricut has done its magic, use your weeding tool to carefully remove the excess vinyl, leaving only the name.
Step 4: Press It On!
Now for the fun part! Position the name on the bunny ear, ensuring it’s centered and straight. Place a Teflon sheet (or parchment paper) over the design, then press with your heat press at around 305°F for 10-15 seconds (or follow the HTV manufacturer’s instructions).
Let it cool slightly before peeling the carrier sheet off. If needed, do one more quick press to ensure it’s fully adhered!
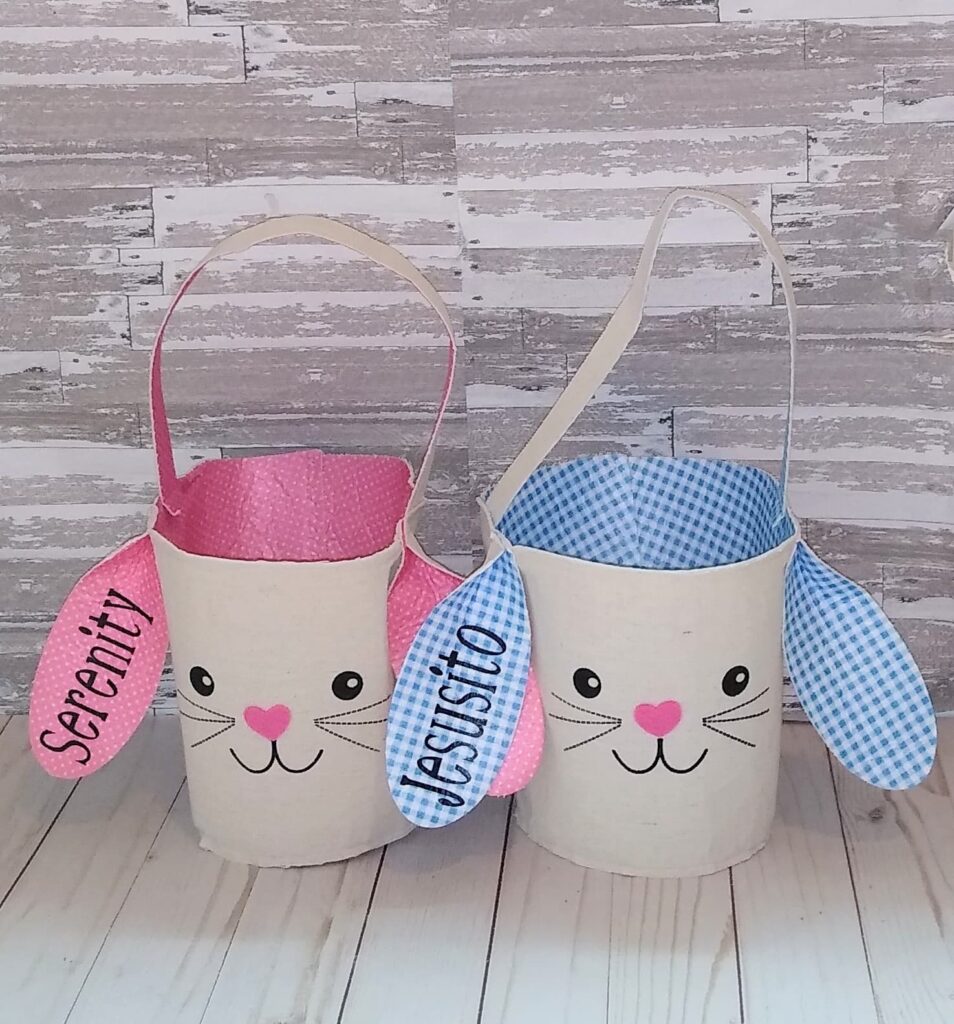
Step 5: Admire Your Adorable Creation!
And just like that, you’ve got yourself a beautifully customized Easter basket ready to be filled with goodies! 🎉
Resources:
No products found.
No products found.
No products found.
No products found.
No products found.
No products found.
Final Thoughts
This project is not only super easy but also a fantastic way to add a personal touch to Easter festivities. Plus, if you’re a small business owner or looking to start an Etsy shop, these personalized bunny baskets would be a hit!
Let me know if you try this DIY—I’d love to see your creations! Drop a comment below or tag me on social media. 💕
Share the Love 💕
If you enjoyed this tutorial, don’t forget to pin it to Pinterest, share it with your crafty friends, or post your own bunny basket creations in the comments below! Also don’t forget to check out my other Craft ideas here: https://dreamsofgraceandgrit.com/crafty-mama/